Twitter

Twitter is a good tool if you use it correctly.

Like all social media, its another story telling device and different stories work on different platforms. For example,this blog couldn't take place on Twitter but can on Facebook.

For me, it's quick, gives you direct contact with people/companies that otherwise you wouldn't have. It's the media platform with all the new news first and because it's a short message 9 times out of 10 it is read, unlike long winded blogs like this.

Only follow and add things you are interested in, so not to clutter the feed up with rubbish. # tag are there to funnel your conversation into different feeds that should help you gain traction. Enjoy Twitter, once you understand it, tweet away..

Have a read of a book call Tribes by Seth Godin.

http://www.sethgodin.com/sg/

"A tribe is a group of people connected to one another, connected to a leader, and connected to an idea. For millions of years, human beings have been part of one tribe or another. A group needs only two things to be a tribe: a shared interest and a way to communicate". Seth Godin

Children's party photography

The other week I took photographs at a child bowling party. This follows on from teenage party the week before.

As with all of my photography, you want the clients and their children to have fun, so don't set out with too many planned ideas because you find children generally go with the flow and if you start to order them about coupled with posing, within minutes you will loose the child attention. A few things you should say to the children before starting is, 1 - have fun, 2 - no model poses, 3 - as many silly faces as possible. Once they have settled into having fun and pulling silly faces they soon forget your there to capture photos. If the parents request some formal poses you would start with them and then back to the fun candid photographs.

You can use a candid style because the children can continue having fun and as you're there for hour, the last thing the children want, is the photographer getting the way of the party and their fun. You can catch some great expressions without interfering, secondly the candid style allows the photographer to become apart of the party and this adds another dimension to the event. One other thing you could do, allow the children to take hold of you're camera and get them to take some photos, they will love it..

You can produce between 20-30 signature photos along with 20-30 party extras, then upload the digitals files to Dropbox and share them.

Lastly, as most party are inside, flash will be essential and if your posing an off camera flash system will help you create some beautiful photos.

The equipment used for the parties is a Canon 60d, 24-105mm, 580ex Canon flash, small Lastelite flash soft box and flash stand.

If you have any questions regarding children's party photography or would you like to me to capture moments from your child birthday party which you can treasure for ever, drop me an email or call me.

neil@neilgrahamphotography.com

Mobile : +44 (0) 7584 900938

Donna Nook seals pups 2013

This weekend I will be heading to Donna Nook Seal Colony in the United Kingdom to capture some wonderful wildlife photos.

During November and December the Lincoln Wildlife Trust fence off a path which runs along the beach, this creates a small viewing area. As this is a wild seal colony the trust has to insure the safety plus protection of the seals pups while allowing the public to park up and stroll along the sand pathway.

As you can imagine there is plenty of photographers who visit and there is a few rules you should observe. 1, Do not touch to the seal pups. 2, Do not feed the seals. 3, Do not climb over the fence. 4, If you bring your children with you, stay with them at all times. 6, Remember the seals are wild and could attack. 5, Take your rubbish home.

For me, rule 1 is very important as the cows (female seals) will abandon their pup if they detect any other scent.

Also, as a previous visitor this is a very popular with the public so an early start is advisable.

You can keep up to date with the seal colony and pups information over on the Lincolnshire Trusts website and you can also view my photographs from 2012 over on my website.

This is also where I'll be posting the 2013 collections during the course of December.

Lincolnshire Trust

http://lincstrust.org.uk/reserves/nr/reserve.php?mapref=15

http://neilgrahamphotography.com/donna-nook-seals/

If you have any questions or would like further information please email or call me.

iphone-20131112140618-0.jpg
iphone-20131112140618-1.jpg

Le Mans 2013 photography review

This year at Le Mans I had a some Objectives.

1. Lower my shutter speed to below 1/40 with my 70-200mm and 100-400mm with and without my 1.4x extender to create a smooth blur behind the car.

2. Take my tri-pod for light trails.

3. Also, taking the panning with the some kind of environment in the back ground. By having signage in the background it tells a non- motor racing person where the photo was taken.

4. Enjoy the racing and not get too wrapped up in having the perfect photo and missing the moment.

To achieve my first objective I knew it was going to be hard. As a normal paying customer with a general entrances ticket I had to take my photographs behind the fence. The safety fence also has another fence in front which is another 2 metres barrier to overcome. With my 70-200mm and 1.4x extender I was down to 1/40, a bit slow, so stayed around 1/60-1/80 and 100-400mm down to around 1/100 and the stabiliser switched on to number 2.

I found the focus length had to be above 300mm to make the fence vanish and all most resting on fence, but something I found the far right frame had a little fence in. Both the 70-200mm and 100-400mm lenses at a slow shutter speed produced a smooth flowing background

With the tripods, I was hoping to produce some time lapse but I never got around to it this year. (Added to my list for next year) I turned to light trails as a good option as after a few shots to have the car lights in the top of the frame and then go out of the bottom, it took an 8 second shutter speed. I took around 20 shots and the 1 below came out the best.

Also, this year I wanted to add a bit of signage behind my panning shot. This would explain to a non-race going straight away where the shot was taken and add a bit of interest. I hunted out a 24 Hours du Le Mans on the concrete walls and come across this one. The photograph below was taken with the winning car from Audi No2.

As for enjoying the race more and putting the camera down, I did. Due to the lack of access behind the safety fence and lighting conditions I put the camera away and watched the race.

I took around 700 photos of the 24 hour race, 200 of the Ferrari Cup and 200 on pit day for 2013. Compared to 2012 where I took around 3000 photos, it does show me with a little planning and some shooting ideas before go you can cut your work flow time by half or more.

I’m already thinking of ideas for next year, time lapse and can't wait to book up again.

If your planning to go next year, you can contact me and ask questions about the race and photography tips.

My new 2013 Le Mans gallery is up for viewing so click on the link and leave your feedback.

iphone-(null)-0.jpg
iphone-(null)-0.jpg
iphone-(null)-1.jpg

Understanding the value of your work

In the last few months I've had people asking for permission to use my photographs. They seem to want the photos for free and then to use them to advertise or sell something. In one case, when I asked for free tickets in return for use of my photo's (instead of cash) , strangely they managed to find other photo's to use.

The latest one is asking to apply a photo on some products. After giving them the option to pay a sum of money for a limited licence or perhaps to work on a commission basis, they said "we are a small company and usually people on Flickr are happy to grant permission because they are thrilled about being asked". Is it me or are people allowing companies to make money off the back of your hard work and expensive equipment while expecting to offer you nothing.

How far would I get with Tesco or with any other company asking for free goods plus the permission to resell it for profit?. Answer, nowhere..

After speaking to Michael at RammellPhotography.com (@Rammellphoto on twitter), he suggested that I should ask them for use of their car at weekend's as a taxi. I wonder what the answer would be??..

I'm not asking for much in a world full of free photo content, but stop selling yourself short and ask for a fare price. Your not going to lose out , because they were going to give you nothing anyway.

Happy Shooting...

Duxford DC-53D Dakota Airshow photograph review

A kind follower on Google Plus asked me how I obtained a crisp photo of this C-53D Dakota at the Duxford Flying Legends Air show 2013. I thought I'd put together a quick check list of what I do for my day time panning shots.

My Gear- Canon 7d and Canon EF 100-400mm f/4.5-5.6L IS USM. Click for technical data.

I was able to burrow Michael Rammell's Canon 7d from RammellPhotography.com for cameras faster frame rate. Head over to Michael's fabulous wedding website to view some of his photographs from his 2013 season.  

1. I set up at the end of the Duxford's grass runway on the bank overlooking the fence and in front of the tank rides around 8am for a 2pm start. To the non Avgeeks this may be a bit early, but by 9am the grass bank was full and this was going to be a hard days shooting, not only the hard light was going pose a problem but the temperature was forecasted to hit 35c and this meant a high f/stop with my low stutter speeds as I didn't have a ND filter. After my trip to the Le Mans 24 hour race in France I knew I could go down to 1/40 hand held. The shot below was at 1/125. See below for full details

2. I always shoot to the right of the histogram in Raw which seems to allow more information to be captured by the APC crop sensor on Michael's Canon 7d.  By coincidence, +Martin Bailey of Martin Bailey Photography recently produced a podcast #381 about shooting to the right and Martin explains it in more technical detail and much better than I could so it's worth heading over to Martin's website or iTunes and have a listen.

3. Start taking test shots to set up your camera and use any aircraft that are taxing and taking off or landing, sadly when the show starts your have to rush because they go around 5 or 6, a few turns and land and thats it, no second chance. While waiting for the show to start, you can also test your panning technic, I stand with feet firmly planted to the ground and rotate my hips as smooth as I can, plus I tuck in my elbows tight to reduce my own nature shake.

4. Always aim for a correct in-camera exposure, which will give you more room in post processing to recover highlights and open up any shadows. I try not to go over ISO 3200 on the Canon 7D but I'd rather have the correct exposure in camera than under expose and recover in Lightroom 4, so I will go above ISO 3200 if required. It's better to smooth the noise in Lightroom 4 with a correct exposure rather than under expose, then increase your exposure in LR4 as this only produces even more noise to deal with as you push it higher. That was not a problem at Duxford with an ISO of 100..

5. I use the 9 centre focus points on the camera for the best sensitivity during focusing and the lenses set on stabiliser 2 for side to side movement.

6. Put your camera in high continuous, Al Servo. I can guarantee that not every photo will not be in focus, as I found in a set 8/9 burst, only number 3 and number 7 would be in focus. I would set up to take 8/9 photos and only expect 2 photos to be useable. For me this is not a bad ratio of return. I also delete the others to save space on my hard drive. Some photographers say never delete any photos, the choice is yours.

8. Normally, all of my aviation photographs are hand held because as a normal paying customer at the airshows there is not enough room for a bigger set up,which also depends on the crowd size. Lastly, I don't own any of the equipment, i.e. big tripod, fluid head or a big prime lens.

9. Finally, I use Lightroom 4 for my post processing. Generally I only adjust the exposure, highlights, shadows, charity and vibrance, then I sharpen, apply noise reduction and lens correction and that's it. No photoshop at all. (Mainly because I don't know how to use it)

Below I have all of my camera settings and my post processing setting in Lightroom 4, plus the before and after photo.

Camera Settings 

1/125 sec at F/13, ISO 100, 300m EF 100-400mm f/4.5/5.6L IS USM

This is 50% Jpegs of the full CR2 un edited. Click on the photo to view more C-53 photographs.

This is 50% Jpegs of the full CR2 un edited. Click on the photo to view more C-53 photographs.

Lightroom 4 processing settings

Temp Custom 5150 Tint +14 , Exposure +55, Contrast +10, Highlights -81, Shadows +76, whites 0, Blacks -20, Clarity +50, Vibrance +25 and Saturation 0.

HSL Saturation Reds +22, Orange +16 Yellows +9 the rest Zero.

I applied a vignetting and small crop.

No Curve, no Split Toning.

Sharpening 56, Radius 1.0, Detail 9, Masking 74, Noise Reduction - Luminance 51, Detail 50, Contrast 28, Colour 25, Details 50

Normal Lens Corrections with LR4 Profiles and Colour.


C-53D Dakota. To view more Duxford Flying Legends Airshow photographs click on the photo.

C-53D Dakota. To view more Duxford Flying Legends Airshow photographs click on the photo.

Thanks for reading the blog and if you have any questions please contact me by phone or email neil@neilgrahamphotograhy.com


Le Mans 2013 pit day Street Style review

This year at the 24 hours of Le Mans race in France I was ready for my panning shots of the cars racing and you can see my review on my technics, plus view more photographs by clicking on the links.

Number 2 Audi being pushed from the race judges

Number 2 Audi being pushed from the race judges

On the Friday before race day they open up the pits for viewing. Also, this year they put previous winning cars along the track going up towards Dunlop corner, so a whole day of photography was ahead of me.

Click on the photo to view more Le Mans Portraits

Click on the photo to view more Le Mans Portraits

Along with taking photos of the cars this year I also tried to employ a kind of street photography style. I'm not a confident street photographer, so below are a couple of street style shots from pit day. Don't know if it works but I need to get out more and pursue this side of my photography.

Michael Rammell from Rammell Photography.com getting close to the action. Click on the photo to view his fabulous wedding galleries.

Michael Rammell from Rammell Photography.com getting close to the action. Click on the photo to view his fabulous wedding galleries.

My gear for this was a Canon 60d , Canon 24-105mm f/4 L IS USM with a 550ex flash with a Canon CP-E4 battery pack. I took the flash this year because lots of the pits are in shadow and you need to use the flash for fill plus lighting.

I turned the photos Black and White in Lightroom 4..

Click on the photo to view more Street Style photography from the pit day at Le Mans 2013

Click on the photo to view more Street Style photography from the pit day at Le Mans 2013

Judgement Day

Judgement Day

I hope you enjoy the photos and leave a comment..

Happy Shooting.


Audi photo review - Panning

A couple of followers on Google plus ask me how I obtained a crisp photo of the winning Audi LMP 1 car at the 2013 Le Mans, I thought I'd put together a quick check list of what I do for my night time panning shot.

My Gear- Canon 60d and Canon EF 70-200mm F2.8 IS USM Mk 1. Click for technical data.
1. Try to find a length of straight with flood lights or perhaps an entrances or between corners, the main reason for this is it provides you with a consent light source and at corners you have cars bunching up which provides light from behind. In a way the flood lights becomes your key and car headlamps become your fill light at ground level.

2. I always shoot to the right of the histogram in Raw which seems to allow more information to be captured by my APC crop sensor in my Canon 60d.  By coincidence, +Martin Bailey of Martin Bailey Photography recently produced a podcast #381 about shooting to the right and Martin explains it in more technical detail and much better than I could so it's worth heading over to Martin's website or iTunes and have a listen.

3. Test shots, to set up your camera and don't rush because they will come past again and again. You also can test your panning technic, I stand with feet firmly planted to the ground and rotate my hips as smooth as I can, plus I tuck in my elbows tight to reduce my own nature shake.

4. Always aim for a correct in-camera exposure, which will give you more room in post processing to recover highlights and open shadows up. I try not to go over ISO 3200 on my Canon 60D but I'd rather have the correct exposure in camera than under expose and recover in Lightroom 4, so I will go above ISO 3200 if required. It's better to smooth the noise in Lightroom 4 with a correct exposure rather than under expose, then increase your exposure in LR4 as this only produces even more noise to deal with as you push it higher.

5. I use the centre focus point on my camera for the best sensitively during focusing and the lenses set on stabiliser 2 for side to side movement.

6. As mentioned before if you find a straight which you can access safely with subjects only moving from left to right, this will help your camera to focus quicker. If the cars are coming at you then away fast, the camera not only has to track the target towards you, then the camera has to move focus, this is one of hardest things for your camera to do, especially in dark conditions.

7. Put your camera in high continuous, Al Servo. I can guarantee that not every photo will not be in focus, as I found in a set 8/9 burst, only number 3 and number 7 would be in focus. I would set up to take 8/9 photos and only expect 2 photos to be useable. For me this is not a bad ratio of return. I also delete the others to save space on my hard drive space. Some photographers say never delete any photos, the choice is yours.

8. Normally all of my photos are hand held because as a normal paying customer at the motor racing there is not enough room for a big set up, but I if remember correctly this time my camera was mounted to a tripod, because I was making a video and this did reduce my up and down movement.

9. Finally, I use Lightroom 4 for my post processing. Generally I only adjust the exposure, highlights,shadows,charity and vibrance,then I sharpen, apply noise reduction and lenses correction and that's it. No photoshop at all. (Mainly because I don't know how to use it)

Below I have all of my camera settings and my post processing setting in Lightroom 4, plus the before and after photo.

Camera Settings 

1/100 sec at F/2.8 ISO 3200 200mm (EF70-200mm f/2.8 IS USM)

This is a 50% Jpegs of the CR2 original before processing in Lightroom 4.

This is a 50% Jpegs of the CR2 original before processing in Lightroom 4.

Lightroom 4 processing settings

Temp 3800 (Fluorescent) Tint +21 , Exposure +30, Contrast 0, Highlights -41, Shadows +62, whites 0, Blacks 0, Clarity +44, Vibrance +20 and Saturation 0.

No Curve, no HSL, no Split toning.
Sharpening- 36, Radius 1.0, Detail 2, Masking 40, Noise Reduction - Luminance 67, Detail 50, Contrast 27, Colour 49, Details 50

Normal Lens Corrections with LR4 Profiles and Colour.

The winning number 2 Audi LMP1 at Le Mans 2013.Click on the image to view more audi photographs. 

The winning number 2 Audi LMP1 at Le Mans 2013.

Click on the image to view more audi photographs. 

I hope this short summary helps you with you're panning shots at night. Again, it does show me using my prosumer camera you can still produce some very good photos.

If you have anymore questions please email neil@neilgrahamphootgraphy.com

Duxford 2013 Flying Legends review

This year I had a chance to visit former RAF Duxford and take photographs of the flying action. Duxford is also apart of the British Imperial War Museum and has many other attractions including indoors, outdoors statics, tank rides, a chance to fly in a Tiger moth & De Havilland plus many other experiences.

This year at Flying Legends there were many different aircrafts, from DC3 to Gloster Gladiator's. As a normal paying customer I set up at the end of the grass runway next to the tank driving school and waited for the 2pm start. You may say arriving at 8am for a 2pm show start is a little to early but by 9am the bank was full. I borrowed a Canon 7d from Michael at Rammell Photography.com  for the faster frame rate and better focusing speed.

After a couple of Airshows last year my objective was to slow my shutter down from 1/400-1/800 to 1/40 and after the Le Mans 24 hour race I learnt that 1//40 was possible hand held. A shutter speed of 1/40-1/60 allowed for a smooth propeller spin which last years shutter of 1/400 and above stop the props in action. So, while an aeroplane is on the ground the plane looks like its parked up, and in the air it looks like an engine has stopped. 

C-53D Foundation Dakota Norway. Click on the C-53D to view more photos

C-53D Foundation Dakota Norway. 

Click on the C-53D to view more photos


As a few aeroplanes were coming and going I had a chance to test my setting. I had problems from the word go, with the hard light, bright sun obtaining the correct exposure was difficult with a slow shutter speed of 1/40 with no ND Filter.  A dark aircraft on a very bright background produced poor shots. So at ISO 100 shutter 1/40, I up the F stops. Another problem with very bright light, is you can't review your shot or chimp (perhaps a positive) because you can't see your screen..

Well, after some missed shots, I started to capture some photos whilst the aeroplanes were taxing and also flying. With the 100-400mm I couldn't get the whole plane in the frame while the planes were taxing , so I settled for a three quarter photo as it was time consuming changing lenses (maybe a second camera). In the sky the focal length of the 100mm-400mm was ideal, other than above 300mm I do find the lens bit soft.

F4U-4 Corsair BuNo96995 The Flying Bulls

F4U-4 Corsair BuNo96995 The Flying Bulls

After a very hot day in the sun and a great display I was ready for heading home. As you can see from some of my photos and I hope you agree that to see the aircraft fly was a wonderful tribute to all the men and women who pioneered flying, plus the sacrifice made during conflicts around the world. 


I will continue to add more Flying Legends images and up date the blog.

Spitfire 1A X4650 Spitfire 1A AR213 Comanche Warbirds & Spitfire F VB EP120 _ The fighter collectionClick on the photo to view more Spitfires

Spitfire 1A X4650 Spitfire 1A AR213 Comanche Warbirds & Spitfire F VB EP120 _ The fighter collection

Click on the photo to view more Spitfires

With Dunsfold Wings and wheels coming up soon,  I'm looking forward to seeing jets plus helicopters and taking more photos of the Screaming Eagles re-enactment group.

If you would like anymore info please contact me at neil@neilgrahamphotography.com


Stephen Cotterell has a chat with me over coffee

 Last Tuesday I had a chat over coffee with Stephen Cotterell for his Photography 121 Podcast   https://itunes.apple.com/gb/podcast/photography-121/id425877463 Also, Michael Rammell Photography join me for the trip to London. After, Stephen gave us a parking ticket, we had a hug and a shake of hands, which put me completely at ease.  It's refreshing to meet a follow photographer with a passion for talking from the heart about photography.

Coffee made and we were off, no rules, no prepared questions and the recorder set.. For someone who has not been questioned about his photography before I found it a little troubling..

Stephen's skill at asking questions put me at ease and the hour went rather quick.. After listening back to the podcast I sometimes forgot what the question was and perhaps not answering with a straight answer, but that's me all over.

Three things I will take away from the chat is that, I need to

push my blogging more (Perhaps a Book). Never lose sight of a photo over the technical quality and lastly add an invoice to my work flow..

Can I say thanks to Stephen Cotterell once again and if you have time please leave a review on iTunes after listening to the podcast..

Neil Graham Podcast https://itunes.apple.com/gb/podcast/photography-121/id425877463

@neilgrahamphoto  on Twitter
gneil45 on Flickr  and G+

Stephen Cotterell can be found at http://stephencotterell.com/and on Twitter as @Stephensmiles  


Source: https://itunes.apple.com/gb/podcast/photog...

Puppy Photography

Last week I had the joy of shooting a miniature Dachshund called Brandy for a friend.

Armed with my Canon 60d, 24-105mm. F4, 135mm f2 and 70-200mm f2.8 I set out for my local art centre. Not only a bar, but a great south facing garden built for William Watts in 1760 http://en.m.wikipedia.org/wiki/South_Hill_Park and around 7pm the light was wonderful.

I was expecting an unruly puppy as all puppies are, it turned out Brandy was very well behaved. I started off we my 70-200mm to obtain some action shots (1/1000 f5.6 ISO 800) as Brandy was running in and out of shadows, ISO 800 allowed for a margin of exposure between the two. Next we had her running down a grass bank with Daisies. Bandy's Brown fir set against the grass and with white flowers was a wonderful combination.

www.neilgrahamphotography.com (1 of 1).jpg

On with the 135mm to exploit the bokeh of this lens. Set at f3.5 I was able have to her head in focus and back ground smoothly out of focus, so we placed her amongst some different coloured Blue Bells.. My favourite shot from the session.

Lastly I put on the 24-105mm for some portraits pics. As she moved up and down the stone stairs the zoom allowed me to stand still and let Brandy to move freely about. I only took 1 posed photo of Brandy glancing over the gardens in a regal stance.

www.neilgrahamphotography.com (1 of 1)-6.jpg

As you see from below, Brandy is a beautiful looking dog and loves being the centre of attention..

To end the great photography shot we headed to the bar for some light refreshments..

www.neilgrahamphotography.com (1 of 1)-4.jpg

I hope you enjoy the photos and please feel free to comment.

Happy shooting..

Black and White aviation photography

I also like photographing aircrafts of all shapes and sizes..

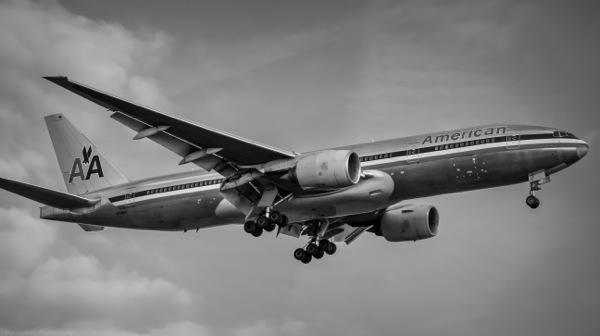
This time I visited London Heathrow airport just outside Terminal 5 in the UK. When aeroplanes are landing on runway 09L you can view the approaching aircraft on the road embankment outside T5 which gives you a great view. Also, you can get directly under the flight path for some great wide angle shots.

After capturing some early morning shots in great light, I moved on to taking some black and white photographs as the sky had sadly started to clear, and the light had become harsh. As you can see from below, choosing the correct aircraft colours in the livery does add to the photos.

The next time the light becomes harsh and you have no dramatic clouds in the sky, perhaps try some black and white photography. In a strange way it adds depth back to the flat harsh light.

Hope you enjoy my examples..
.
@neilgrahamphoto on twitter

gneil45 on Google+

www.neilgrahamphotography.com

iphone-(null)-0.jpg
iphone-(null)-1.jpg
iphone-(null)-2.jpg
iphone-(null)-4.jpg

White Wall canvas review

The time had come for a big canvas. In choosing the photo for the canvas I required a landscape aspect for a bare wall in the house..

As it happened, one of my recent projects was traveling to the Donna Nook seal colony in England to photograph the 2012 pups. I had many photos to choose from. I narrowed it down to 5 photographs and the photos below show it was a hard choice.

I settled for testing The White Wall service, which seems to give a much better finish and perhaps provide a longer lasting piece of art work than others could supply so uploaded a Tiff file and went for 123cm x 78cm canvas..

When it arrived the overall packaging was excellent, thick cardboard with wooden slates protecting the sides. As this was printed on fabric when I took it out of packaging I was disappointed. In the bright light the canvas allowed light through it, which made the colours wash out and my the photo look awful. When I got it home I drilled some holes and hung it on the wall, within seconds, blocking out the light from behind the canvas, it then came to life.. The blues, greens and the creams gave depth to the whole photo..

The reason for choosing this photo were the pups eyes. It doesn't matter what angle you look at this photo, the seal pup is always looking at you..

In summary, I like the fabric which it was printed on, the colours are rich and when night draws in the canvas changes with the amount of detail you can see giving the picture a different look.. The only draw back was as the fabric shrunk and it twisted the frame a little.

I would buy again from White Wall, plus I will require more wall space...

Get something printed, because with all of the digital media to view your work there is nothing like holding a big canvas of your own photography.

Happy shooting...

@neilgrahamphoto on Twitter

Neilgrahamphotography.com

iphone-(null)-0.jpg

Hawk Conservancy Trust

​My family and I planned our first visit to the Hawk Conservancy Trust in England. The trust have several large birds of prey, plus flying displays, so I packed my camera bag and set off. 

After arriving at the wonderful facilities we set out for our first flying display. The sun was in and out of the clouds, plus the 100-400mm goes from F4.5 at 100mm to F5.6 at 400mm, so I set the camera to Shutter Priority at 1/1000th to freeze the action. The 100-400mm lens on my Canon 60d was the best combination for the great distance between me and the birds. The 70-200mm would of been better for the portrait shots but this was out on loan. The draw back of this lens was the slow focusing speed for the fast Hawks and sharpness at 400mm. Below are actions shots from the Golden Eagle, Fish Eagles and Kites.   

_MG_1498.jpg
_MG_2084.jpg
_MG_2299.jpg

After the hectic flying display it was time for a few portrait shots of the huge birds of prey , so with no 70-200mm with me, I continued using my 100-400mm. The magnificent Bald Eagle stood around 75cm tall and the giant bird of prey was in stunning condition as he donned his modelling hat on.

_MG_1886.jpg

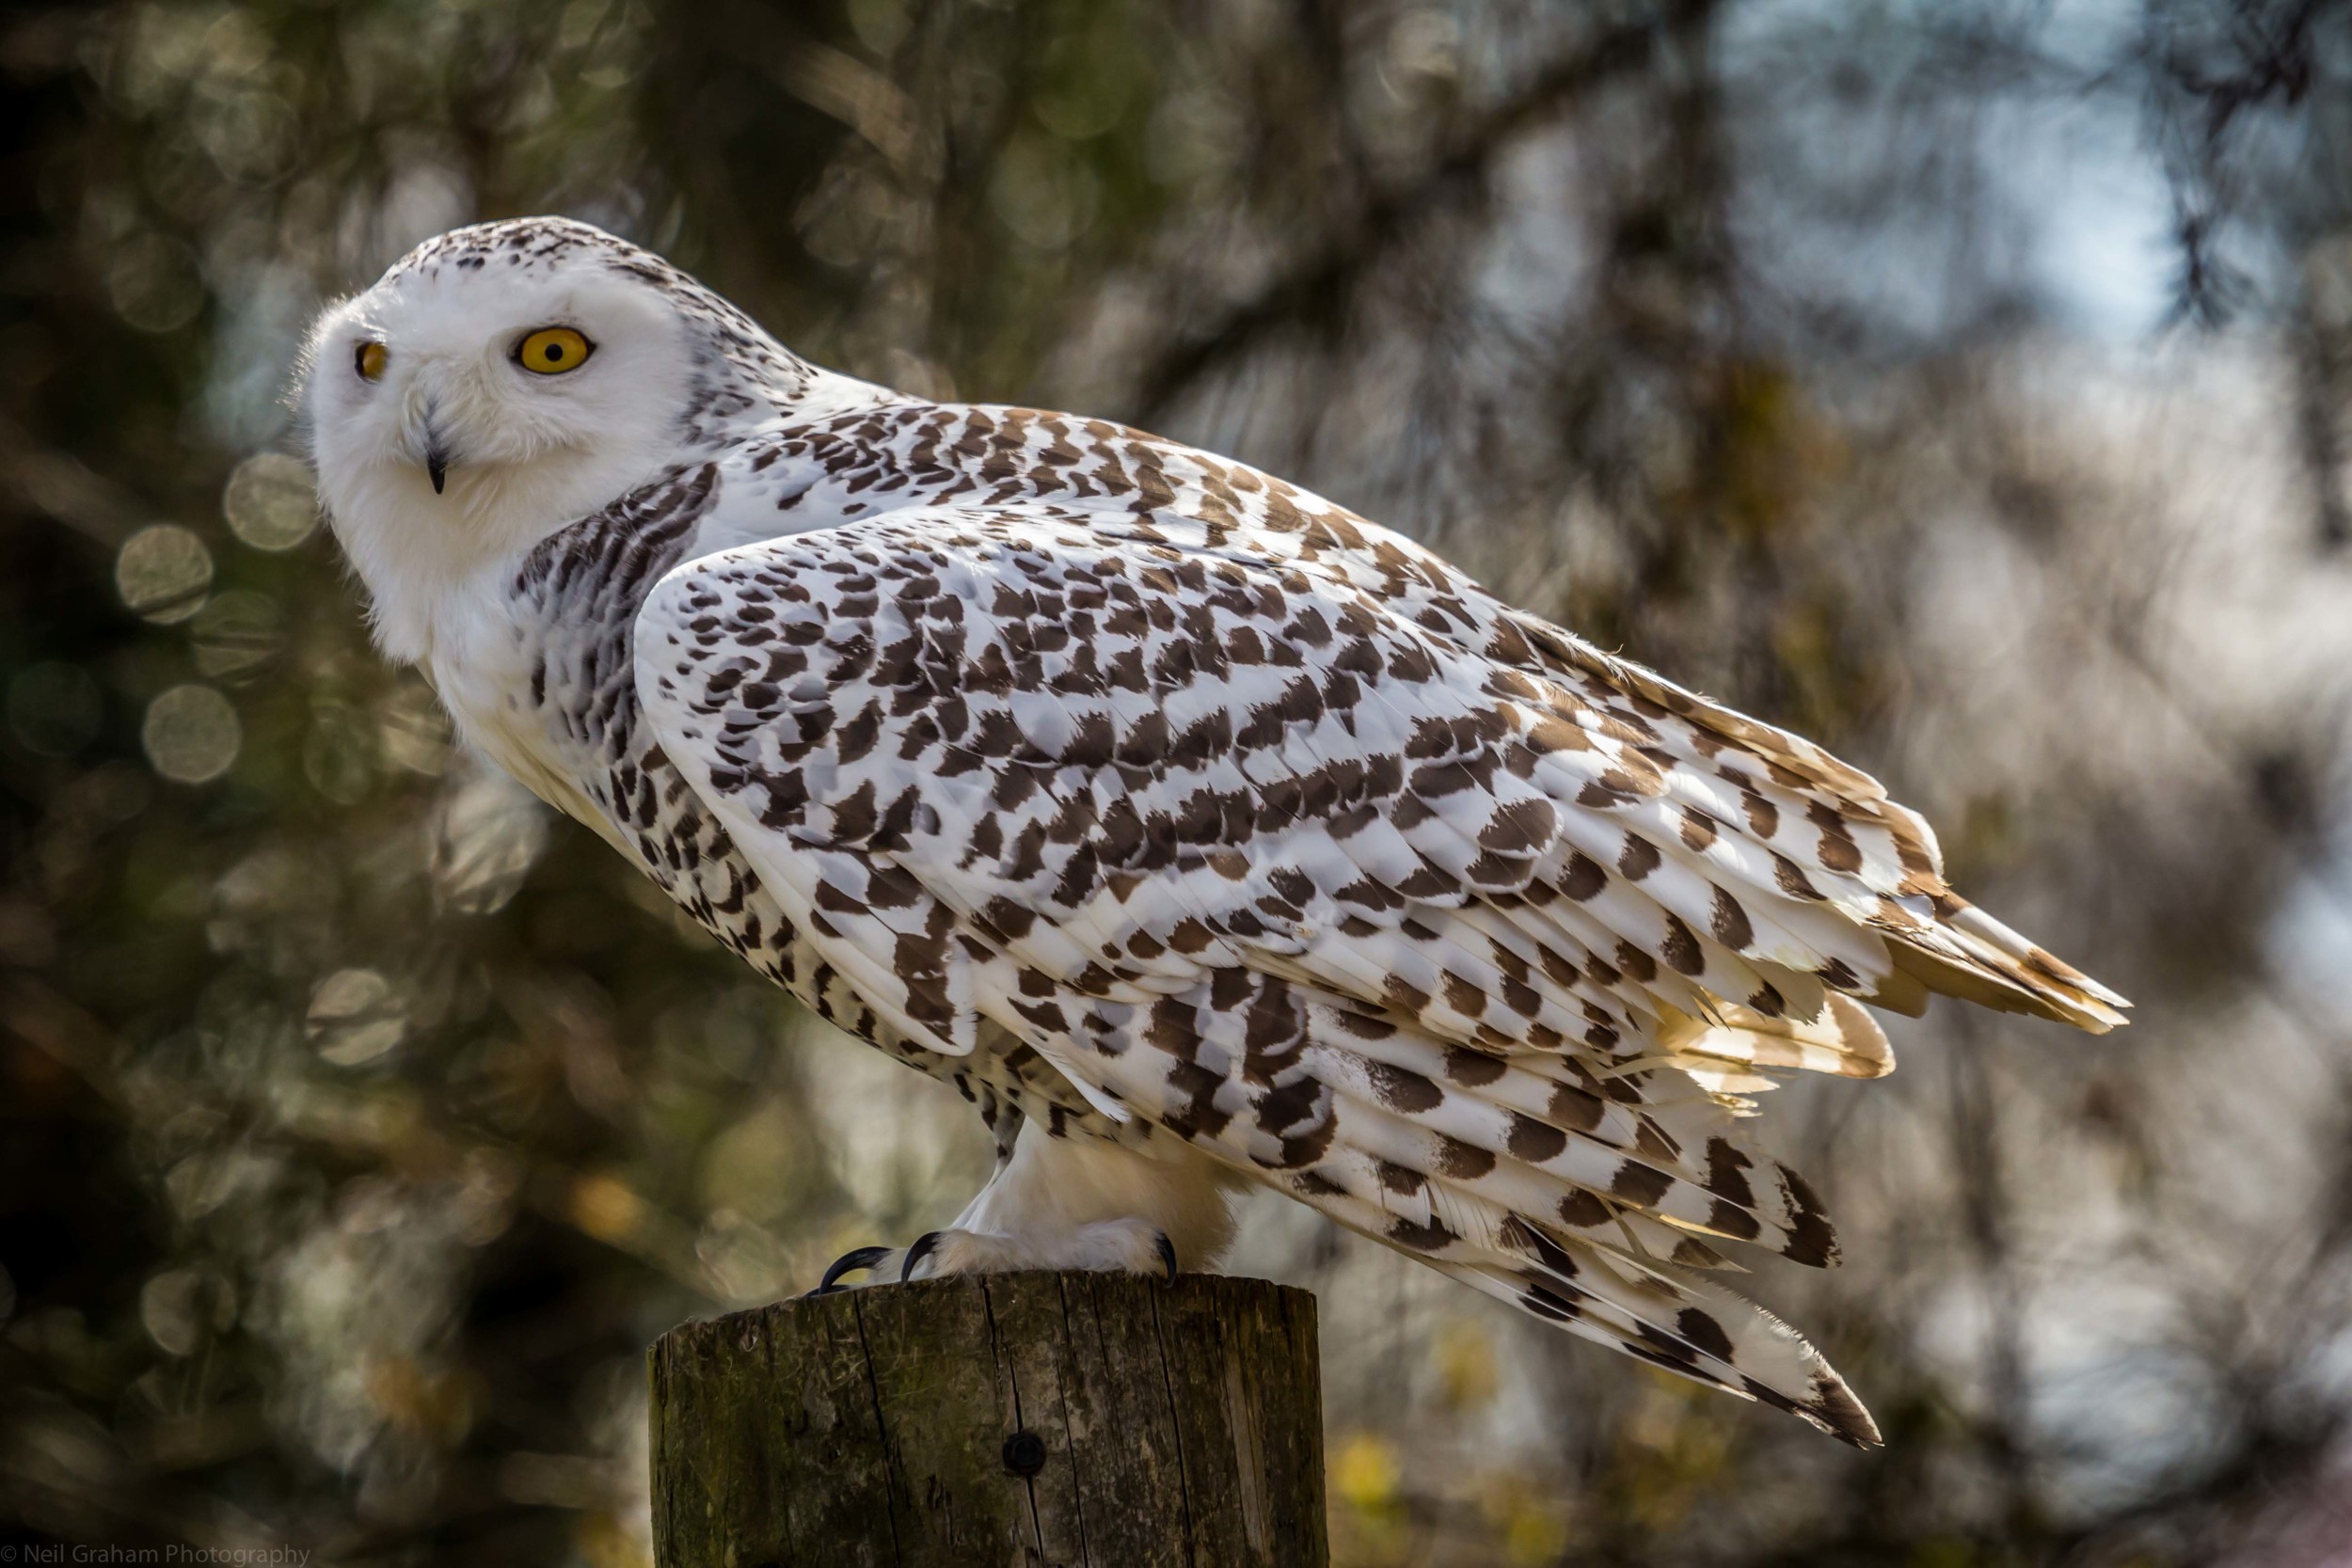
​The Snowy Owl 

_MG_1585.jpg

​Tawny Owl

​You can view more photographs from the day by clicking on the Tawny Owl photo.

​As a parent I urge you to go with your family and as a photographer its a must visit. 

Next time I'll take the 70-200mm for the portrait shots.

Happy Shooting..​

@neilGrahamphoto on Twitter

Taking photos at Bracknell Town vs Aston Clinton

Last weekend I tried taking some sports photography at my local Bracknell Town Football Club.

My equipment was a Canon 60d, 100-400mm f4-5.6 L lens, manfrotto mono pod and my Sandisk pro SD cards. It's not the first time I've shot football as I have taken photos at Reading FC. Normally I would borrow a camera and lens from Michael at www.rammellphotography.com which allows me to the have a 70-200m f2.8 L Mk2 lens plus an extra body for closer action shots. This time he was on a photo assignment and required his equipment.

I arrived 25mins before kick off and set up. There was heavy cloud which produced snow during the match and no flood lights. The sun did pop out once during the match which helped with my slow glass, (Canon 100-400mm f4-5.6) trying to keep a fast shutter speed of 1/1000 and keeping my ISO down was next to impossible..

The game kicked off at 3pm and even at this time I was on manual at 1/1000th to freeze the action 5.6f at ISO 3200 , high speed continuous, Al focus. With the changing light during the match,
my settings were between 1/1000th f5.6 ISO 3200 - 1/640 f5.6 ISO 5000. I couldn't go below 1/640 because of subject blur would happen and my ISO was 5000 , which is the camera's max and produces noise but the photos are still usable. Also, I was going to try some panning shots, but this was a semi-final game and I needed to be ready for a goal, and then player celebrations, so a high shutter speed to freeze the actions was the order of the day. If I had 2 cameras, I would have set up one of them to do this.

As you can see from the photos below, I tried to include some of the manager's reactions along with the player action.

It does show me that, even with prosumer gear, you can come up with some respectable shots, so never let your gear hold you back from trying something different, it's the photographer that presses the button and not the camera.

Saying that, having a Canon 1D X and a 400mm f2.8 would be nice for the increase camera and lens performance, but for my level and affordability I can produce usable photos with my equipment.

Get our there and try something different with the equipment you have...

Bracknell Town 0-2 Aston Clinton

Happy shooting

On twitter as @neilgrahamphoto

www.neilgrahamphotography.com

iphone-(null)-0.jpg
iphone-(null)-0.jpg
iphone-(null)-1.jpg
iphone-(null)-2.jpg
iphone-(null)-3.jpg
iphone-(null)-3.jpg
iphone-(null)-4.jpg

Richmond Park and the wrong shutter speed!!!!

Michael Rammell of http://www.rammellphotography.com/ and I recently visited Richmond Park in London England for a photo walk. The day was overcast and inbetween the clouds the late afternoon sun provided excellent lighting conditions. I had my Canon 60d with my 100-400mm lens on.

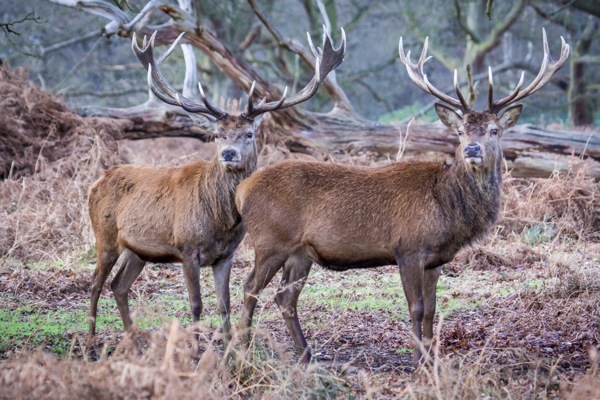
We set out to find a herd and it wasn't too long before we came across some stags and I fancied taking some stills. Trying to keep the ISO at 1600 (or below to maintain low noise) and a shutter speed of around 1/160th at f5.6.

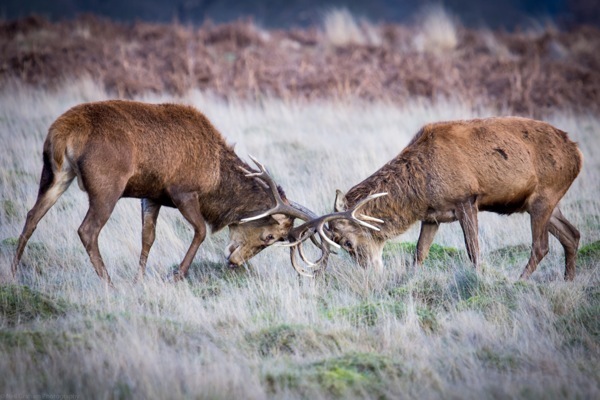
Michael and I starting shooting and got the standard stags posing shots and them looking at me. After a few minutes the stags starting sparring, what a great opportunity to get some action pics and without thinking during the whole shoot, I shot at 1/160th/320th ISO 1600 at f5.6.

The following day I started to process the photographs and within seconds I found out that most of my shots were blurred. A light bulb clicked on in my head, I said to myself, shutter speed!!!!!. Because I set up to take still shots and not the sparring stags I didn't change to a faster shutter to freeze the action, plus shooting on the move I ended up with camera shake and motion blur shots. Luckily I ended up with a couple of good photographs from the afternoon, but I have to remind myself to slow down in future.

As with all photo walks, slow down, assess what you are going to take photos of and get your camera settings correct first, then start shooting and you will not be disappointed by the results...

If you would like details or arrange a photo walk with us please contact : Richmond Park or Royal Windsor. neil@neilgrahamphotography.com michael@rammellphotography.com

Happy shooting..

www.neilgrahamphotography.com @neilgrahamphoto on Twitter

Coming soon: A review of a White Wall canvas print.

iphone-(null)-0.jpg
iphone-(null)-0.jpg
iphone-(null)-1.jpg
iphone-(null)-1.jpg
iphone-(null)-1.jpg

Not just freezing the action ?.

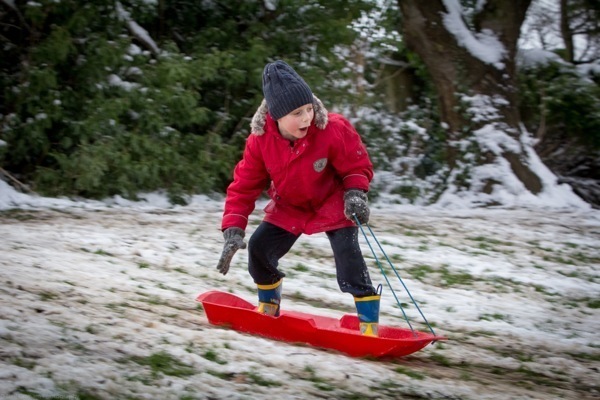
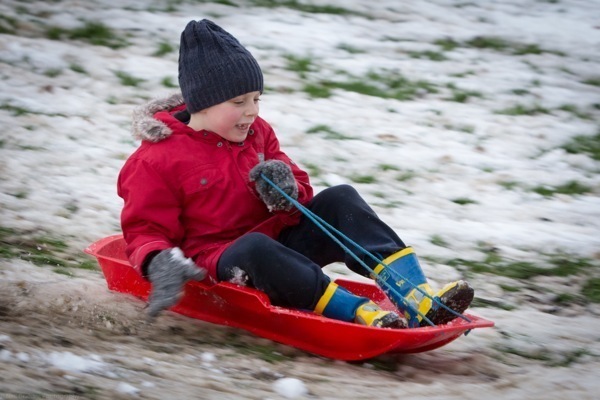
With the recent snow fall In the UK I went out and spent an hour taken photos of my son sledging and freezing the action with 60d and Mk1 70-200mm lens. Yes, I was pleased with the outcome, but in some of the photos it looked like he was parked up and not speeding down a hill, as you can see in the first three 3 photos. 1/1000 f5 135mm

It was time for something different, panning?... As I'd used this technic at Silverstone Race Track I thought I would give it a go again . The hill was short and my son was zipping past, so I starting at 1/50 f6.3 70mm high speed continuous in Raw and this produced camera shake and the whole photo was blurred. I moved up through the shutter speeds and settle between 1/80 - 1/160, f5.6-f6.3 70mm and with the stabiliser switched to 2 for side to side movement. Trying to move the camera from side to side whilst going up and down a hill and focusing on a fast moving target was hard and ladies, you know men can't muti-task! It resulted in me losing my balance and ending up in a heap.

I was happy with the results and as you can see from the last seven photos I had fun trying to produce a sharp image with a blurred background to suggest movement. Give it a go and remember 1 photo in your burst should be in focus and just work on that one in Lightroom 4 and bin the rest.

Happy Shooting....

Coming up soon...
Richmond Park 2013 shoot and using the wrong shutter speed and blaming the camera for moving it.....

iphone-(null)-0.jpg
iphone-(null)-0.jpg
iphone-(null)-1.jpg
iphone-(null)-1.jpg
iphone-(null)-2.jpg
iphone-(null)-2.jpg
iphone-(null)-3.jpg
iphone-(null)-3.jpg
iphone-(null)-4.jpg
iphone-(null)-4.jpg

Neil Graham being featured on the DPE Podcast

The photo below was reviewed and mentioned on the DPE Podcast 0.02.2013 iTunes. I was over the moon...

Rick Sammon http://ricksammon.com/welcome/ and Juan Pons http://juanpons.org/ have given me positive feedback, Juan commented on the "quality of light and direction " plus Rick quoted that "it looks like he has darkened the edges like the renaissance painters to draw more attention to the image".

Now, the DPE podcast is great and being featured on it was a bonus. I have great respect for Rick and Juan photography and when two people of this caliber are picking out my photo from hundreds perhaps thousands posted, I was taken by surprised and humbled.

It has shown me as an amateur photographer that I am moving in the right direction and the quality of my work is being noticed around the world. Again, thanks to them both and I look forward to many more DPE Podcasts. http://dpexperience.com/

Your can find Rick & Juan on Twitter and Google+, Twitter @ricksammon & G+ +Rick Sammon , Twitter @Jpons & G+ +Juan Pons . Im also on Twitter as @neilgrahanphoto and on Google+ as +gneil45

www.neilgrahamphotography.com

Blog coming soon : Using the wrong shutter speed!!!

iphone-(null)-0.jpg

Snow blog

As most of the UK was under snow this weekend, it was time to hit the slopes.... Dog, my son and my 60d, MK1 70-200mm in tow we all set off. My challenge was to produce some black & whites..

Here are some of the results.

iphone-(null)-0.jpg
iphone-(null)-0.jpg
iphone-(null)-0.jpg
iphone-(null)-1.jpg
iphone-(null)-1.jpg
iphone-(null)-2.jpg

My son modelling for me..

Last Sunday I headed to a local Art centre for a photo shoot with my son. South Hill Park in Bracknell Berkshire offers a great back drop for photography. With the sun being covered by clouds ,which provided good defused light in the south facing garden.

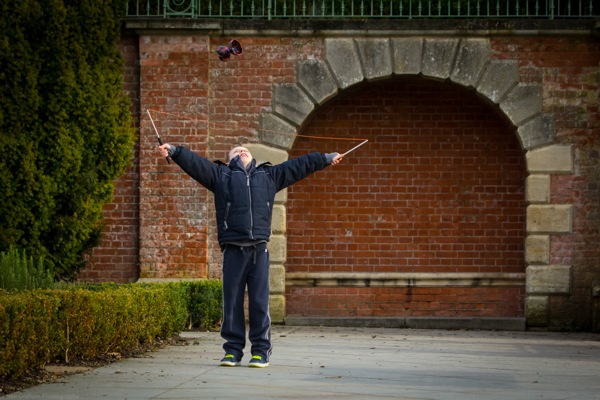
I had my Canon 60d and my Mk1 70-200mm f2.8 on. He had his Diablo with him so he started showing me his latest trick and after taking some action shots I got him to pose for me. An hour later the cold got the better of us and we headed inside.

The results were pleasing and it has lead me to thinking of our next set. He loved posing and if the cold had not got the better of us we would have carried on.

iphone-20130115203213-0.jpg
iphone-20130115203213-1.jpg